Showing posts with label Tutorials. Show all posts

Friday, September 22, 2023

Maple Leaf Quilt Block Tutorial

Today I'm sharing a tutorial for these classic Maple Leaf quilt blocks!

Before we get started, I want to let you know that there's a free printable version of these instructions available here. I've included two sizes for you, a 9 1/2" block and a 12 1/2" block.

Want to see what you can make with these blocks? Be sure to scroll to the end to see the quilt I made using the 12.5" blocks.

Maple Leaf quilt block tutorial by Andy Knowlton of A Bright Corner quilt blog

For this example I'll be using a single print to make one block but these Maple Leaf blocks are also really fun as a scrappy block. So pull out those scraps and give it a try!


Here's what you'll need for one 12.5" x 12.5" block

  • 4 print squares, 4.5" x 4.5"
  • 2 print squares, 5" x 5"
  • 2 background squares, 5" x 5"
  • 1 background square, 4.5" x 4.5"
  • 2 background squares, 4" x 4"

Maple Leaf quilt block tutorial by Andy Knowlton of A Bright Corner quilt blog

Saturday, January 14, 2023

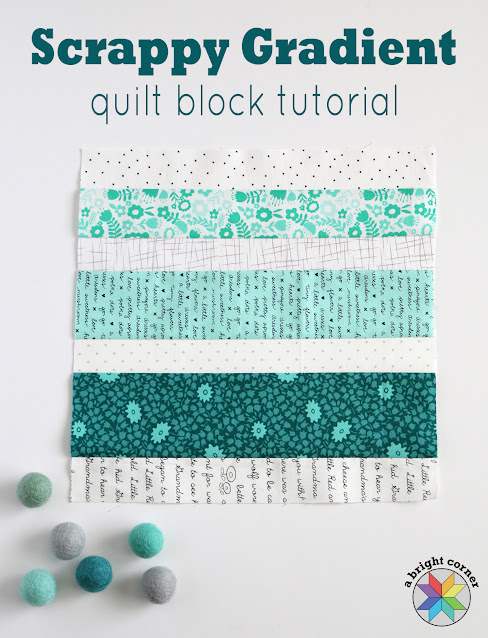
Scrappy Gradient Block Tutorial

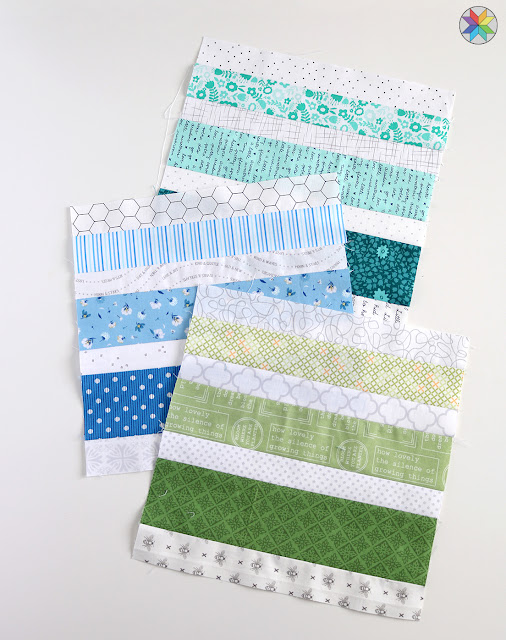
Ready for a simple but really fun quilt block tutorial? You're going to love this one. It's perfect for using up those scraps that I KNOW we've all be saving. These are fast to make, and it's fun to dig into your scraps and play with colors and values.

This is called the Scrappy Gradient quilt block and I created it for an online quilting bee that I was a part of a couple years ago. 

Scrappy Gradient quilt block tutorial by Andy Knowlton of A Bright Corner a scrappy free quilt block pattern

This block is great for quilting bees and block swaps because it's easy enough for even beginner quilters, it's a quick block so you can have each quilter make 2-3 blocks, and in the end you get such a great variety of scrappy fabrics and different prints. 

Scrappy Gradient quilt block tutorial by Andy Knowlton of A Bright Corner a scrappy free quilt block pattern

Wednesday, November 9, 2022

Sketch Stitched Ornament Tutorial

I have a fun tutorial to share with you today! 

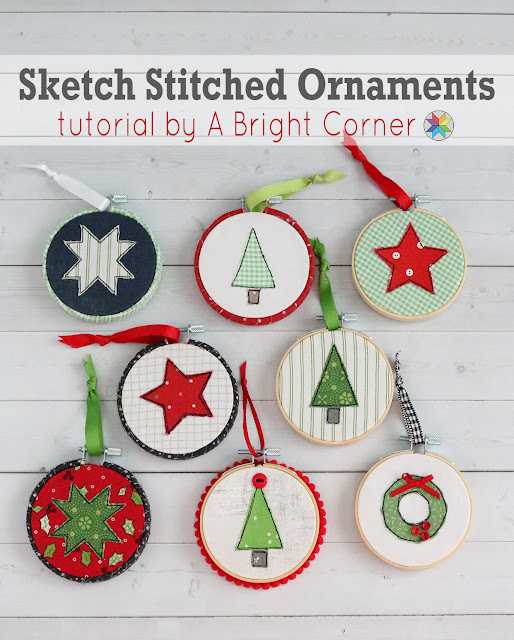
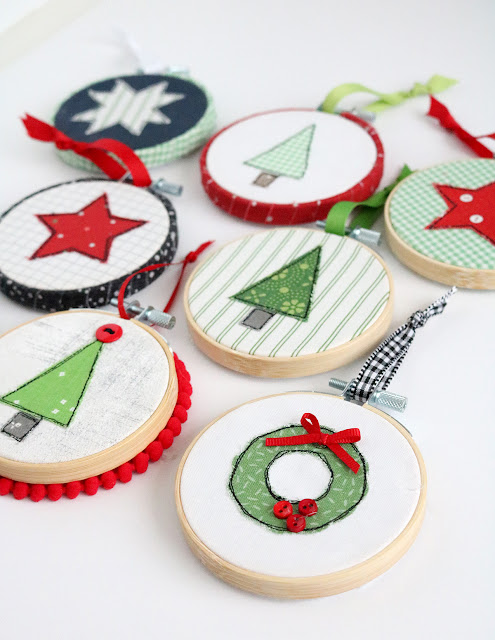
I've been making some of these Sketch Stitched Christmas Ornaments lately and they're fun to make, easy to customize, and a great way to use those fabric scraps we all have on hand. Plus they're a great handmade gift idea!

Sketch Stitched Ornament tutorial a fast and fun embroidery hoop Christmas ornament idea found on A Bright Corner quilt blog

To make these ornaments I used the raw edge applique technique but... instead of using matching thread and hiding my stitches I love to add some outlining stitching in a nice dark, contrasting thread. It helps the little shapes to stand out really nicely against whatever fabric you use for the background. 

And you can let go of worrying if your stitches are perfect or not - just relax and have fun with these. The stitching looks so fun when it's slightly imperfect - it gives it that "sketched" look!


Ready to get started? 

Fast and fun embroidery hoop Christmas ornament idea found on A Bright Corner quilt blog

Wednesday, October 26, 2022

Build A Heart Quilt Block Tutorial

I'm delighted to be a part of the #SewPINK initiative again this year with ByAnnie.com and I have a quilt block tutorial to share with you as a part of this blog hop.

This year ByAnnie.com is joining forces with the Fat Quarter Shop with a goal to raise $20,000 to be donated to the National Breast Cancer Foundation, and ByAnnie.com will match every dollar raised on the #SewPINK fundraising page here. 

(A PDF download for this pattern is available in my shop here)

Scrappy heart quilt block tutorial called Build A Heart quilt pattern

Six years ago I became a breast cancer survivor myself, and during the months of surgeries, procedures, and healing, my quilting friends all gathered together to make a beautiful scrappy heart quilt for me. It is one of my most treasured items.

As a very small way of giving back, I've created a scrappy heart quilt block that could be used by a group of friends or a quilt guild to make a handmade gesture of love and support to someone battling cancer or just going through a difficult time. 

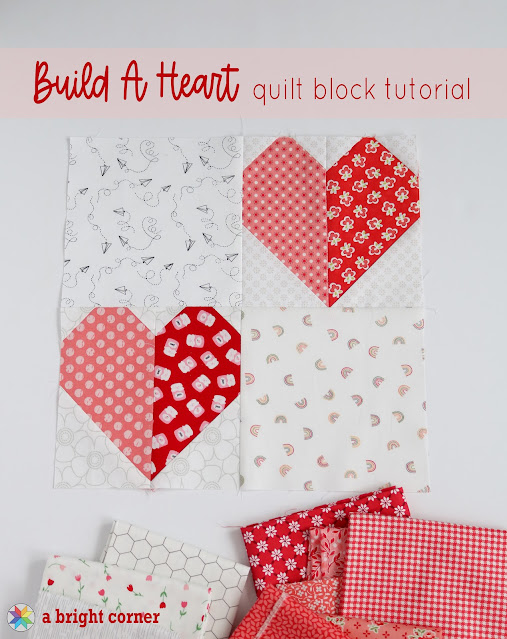
I'm calling this block the Build A Heart quilt block - you start with a scrappy little heart and then you have three options to build it into a 12.5" quilt block. Here's a look at a couple of the blocks:

Build A Heart Scrappy Quilt block pattern by Andy Knowlton of A Bright Corner

Wednesday, September 21, 2022

How To Sew A Partial Seam

 Hello and welcome to any new visitors!

Back to School blog hop 2022 found on A Bright Corner quilting blog

Today is my turn on the Back to School Blog Hop - a chance for all of us to learn some great new tips, tricks, and techniques from 16 different quilters.

Today I'll be sharing a piecing technique that's a great one to have in your tool box. At first it might be a little intimidating but once you learn it, it really unlocks a lot of great block ideas and patterns. 

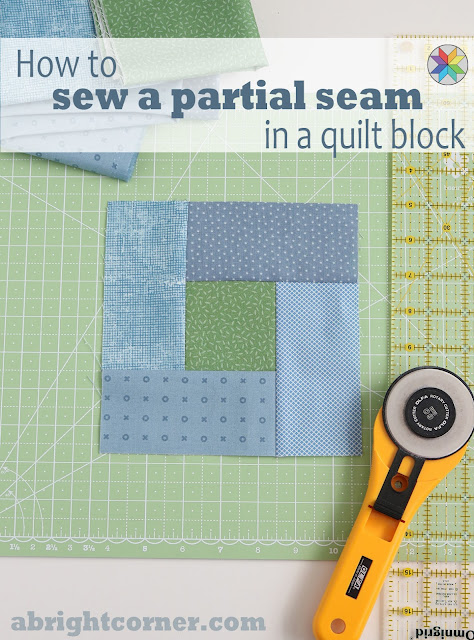
Wrap Around quilt block tutorial by Andy Knowlton of A Bright Corner - uses charm squares or fabric scraps

Have you heard of partial seams? Partial seams are not difficult - the best way for me to explain partial seams is to show you...I'll step you through it, using a tutorial for this 6 1/2" Wrap Around quilt block. 

And if you'd like the full Wrap Around quilt pattern scroll to the bottom for a link to download.

Wednesday, October 21, 2020

Scalloped Quilt Border Tutorial

 Ever since sharing my Winsome quilt last week I've received a lot of questions about how I did the scalloped border. I admit that up until this month I was completely intimidated by the idea of scallops, and also a little afraid I'd mess up my quilt. 

So today I wanted to share a tutorial showing how I created the scalloped border.  Are you ready to try it? 

How to add a scallop border to a quilt - a tutorial by A Bright Corner - a foolproof way to make a scalloped edge on a quilt

First of all, here's what we're talking about. See the curved edges on the quilt below?  That's a scalloped border.  

Around the web you can find a variety of different tutorials and tricks to make scallops. Each technique seems to have a different "look" to them.  Some have deeper curves, some are more of a "wave" look -- personally I prefer the size and shape of these scallops. 

Plus the tool I used here* makes scallops SO easy and you can use this template for any size quilt.  I'm not one to buy a bunch of unnecessary rulers, but this is definitely one that I'm happy to have in my toolbox.  I've used it twice in the last month and I know I'll be using it again.

**This post contains affiliate links, which means I may receive a small commission (at no additional cost to you) when purchases are made through links found in this post. Thank you!


How to add a scallop border to a quilt - a tutorial by A Bright Corner - an easy way to make a scalloped edge on a quilt

Ready to get started?  Here's what you'll need:

How to add a scallop border to a quilt - a tutorial by A Bright Corner - an easy way to make a scalloped edge on a quilt

You'll also need a quilt that has already been quilted and is ready for binding. I'd recommend having no less than a 2.75" or 3" border on your quilt.  Keep in mind that if your border is less than 2.5" or 2.75" then you'll be cutting into the block portion of your quilt top when you cut the scallops!

Step 1: Trim the edges of your quilt so they're even.  Sometimes after quilting the edges of a quilt can be a bit wavy and you'll want a nice, straight edge to work with. I went around my whole quilt and trimmed the border to be 3.25" all the way around.  


Step 2:  Ok. Time for just a bit of math - and this is the trickiest part, I promise! 

 Measure the width and length of the quilt top.  Subtract 4" from each.  For example:

width: 68" - 4" = 64"

length: 77" - 4" = 73"

Take these two numbers and refer to the chart on page 15 of the booklet that comes with the ruler. By looking at the chart* I can see that for the top and bottom edge of the quilt I can get 8 scallops that are each 8" long.  And on the sides of the quilt I can get 9 scallops that will be about 8" long.

So now I know I'll be making 8" long scallops.  It's okay if your scallops are different sizes, but you'll want them as close in size as possible. Having 6" long scallops along the top edge and 9" long scallops along the sides would be noticeable. But having 7.5" and 8" scallops would not be.

*If you want to skip the chart and do the math yourself, scroll to the very bottom of this post and I'll step you through it. You really have a lot more options when you do the math yourself so it's worth taking a look!


Step 3: Use a straight ruler and a marking tool/pen to mark a diagonal line through the border to the corner.  I started marking mine with a hera marker but then realized the markings don't show up in photos well, so I added the purple line so you could see what I meant.

How to add a scallop border to a quilt - a great tutorial by A Bright Corner - she makes it look easy!

Step 4:  From step 2, I've determined that my scallops will be 8" long. So I find the 8" marking on the scallop ruler and place that on the diagonal line.  Be sure to have the solid line of the ruler placed on the edge of the quilt. 

Place a pin to mark the 8" spot on the other end of the ruler (see the circle in the photo below).

How to use the Scallops, Vines and Waves template from Quilt In A Day - A Bright Corner shows how to use the ruler to make a scalloped edge on a quilt


Step 5: Mark two more scallops in the same manner - placing the 8" ruler mark on the previous pin and adding a new pin where the next 8" ruler mark is.  


Tutorial for using the Scallops, Vines and Waves template from Quilt In A Day - A Bright Corner shows how to use the ruler to make a scalloped edge on a quilt


Step 6: After marking three scallops, move all the way down to the next corner and start marking scallops heading to the left.  Any size adjustments to the scallops will need to be made on the center scallops so we're starting on the corners and working our way in to the center.  

Place the 8" mark of the ruler on the diagonal line as we did previously. Place a pin in the 8" mark on the left end of the ruler.  Then move the ruler to the left and mark the next scallop in the same manner (see photo above). 

Step 7: Keep marking scallops on each end a couple at a time until you meet in the middle.  The photo below is where I met in the middle of my quilt - see how that center scallop will be larger than 8"?  It looks like my measurements are way off, but no worries!  This is where the adjusting comes in.


Tutorial for using the Scallops, Vines and Waves template from Quilt In A Day - A Bright Corner shows how to use the ruler to make a scalloped edge on a quilt


Because my center scallop is too large, I can go back through the center 3 or 4 scallops and adjust each one to be just a bit larger than 8".  It is important that you only adjust the center scallops and not the ones on the corners.  

For my quilt, the center few scallops ended up being more like 8.25" long but that difference is not noticeable in the finished quilt.


Step 8: Repeat steps 4-7 for the opposite side of the quilt, and then for the top and bottom of the quilt.

On the top and bottom of my quilt my center scallop was too small.  So I needed to adjust the center few scallops just a bit shorter than 8". They were more like 7.75" long, but again that wasn't noticeable in the finished quilt.    


Step 9: Once all scallops are marked with pins, you're ready to draw the scallops.  I used a Fine Point Disappearing Ink pen (air and water soluble) to mark my scallops.  But you can use any non-permanent marking pen.  Fat Quarter Shop has a Sewline Air Erasable Fabric Pen here that would work great.

Be sure to line up the solid line on the ruler with the edge of your quilt! (see photo below)

Tutorial for using the Scallops, Vines and Waves template from Quilt In A Day - A Bright Corner shows how to use the ruler to make a scalloped edge on a quilt

Draw the scallop then move the ruler down, using the pins and the edge of the quilt to line up the ruler.

TIP:  Leave the pins in your quilt until you begin cutting!  I had to step away from my quilt and by the time I got back, some of my scallops had faded and I needed to re-draw them.  I was so glad the pins were still there!

Tutorial for using the Scallops, Vines and Waves template from Quilt In A Day - A Bright Corner shows how to use the ruler to make a scalloped edge on a quilt

Continue marking the scallops around the edge of the quilt until you come back around to where you began.  You can see in the photo below how the arc of the scallop matches up with the other one at the corner.

Tutorial for using the Scallops, Vines and Waves template from Quilt In A Day - A Bright Corner shows how to use the ruler to make a scalloped edge on a quilt


Once the scallops are drawn, use a pair of sharp scissors to cut along the drawn lines.  Remove pins as you go.

 
How to add a scallop border to a quilt - a tutorial by A Bright Corner - an easy way to make a scalloped edge on a quilt

Honestly, this was the nerve wracking part for me! Double check your scallops if you need to, then just take a deep breath and start cutting.  

How to add a scallop border to a quilt - a tutorial by A Bright Corner - an easy way to make a scalloped edge on a quilt

My corners had a bit of a point to them, which is not unusual (see photo below)...

I've always wanted to make a scalloped edge on a quilt - love this tutorial by A Bright Corner - she shows how to do it!

...so I just used my scissors to smooth out that curve. Much better!

How to add a scallop border to a quilt - a tutorial by A Bright Corner - an easy way to make a scalloped edge on a quilt

You did it! Well done. See....not that bad, right?  

Now you're ready to add the binding.  You'll need bias binding for this quilt which will help it to lay beautifully flat around all of those curved edges.  I cut my bias binding strips at 2.25 for this project.


Tutorial for adding a scalloped border to a quilt - tips and tricks from A Bright Corner

Binding this quilt works just like binding a regular quilt but at each scallop "valley" you'll stop at the bottom point, leave your needle in the fabric and pivot the quilt to line up the edge of the next scallop. Then keep going. 

The first few scallop "valleys" may feel strange to you but you'll quickly get the hang of it.  

Scalloped edge quilt tutorial - how to add a scalloped border on a quilt - a helpful tutorial from A Bright Corner

I do recommend machine stitching the binding to the front of the quilt, and then hand stitching it to the back of the quilt. Everyone has their preferred way of doing quilt binding so it's hard to say what will work best for you.  

Scalloped edge quilt tutorial - how to add a scalloped border on a quilt - a helpful tutorial from A Bright Corner

Some tips:

  • One thing I learned is that it's a lot less exact than I thought it needed to be.  Small adjustments in the middle few scallops are not noticeable in the finished quilt.  
  • The first time you make scalloped edges on a quilt will be the slowest.  Then you'll get the hang of it and it will be quicker next time - and more fun.
  • If you prefer more of a wavy edge instead of a true scallop, the same ruler will help you with that - another reason to have this ruler in your toolbox. There are separate instructions inside the booklet for doing a wavy edge, plus another section for adding applique vines to a quilt. It really is such a useful tool!
Winsome quilt by A Bright Corner - love the scalloped border - she share a helpful tutorial for how to add a scallop edge on a quilt

If you have any additional questions that I didn't answer just add them to the comments at the bottom of the post! 

And for more details about the quilt shown in these photos, visit this blog post.


How to add a scallop border to a quilt - a tutorial by A Bright Corner - tips for making a scalloped edge on a quilt


Want to figure out the math on your own?  Here's how:


Measure the width and length of the quilt top.  Subtract 4" from each.  For example:

width: 68" - 4" = 64"

length: 77" - 4" = 73"


Next, we want to find a number that we can divide them both by (or close enough).  This will help us determine the size of the scallop and how many will be on each side. 

In this case, I can divide 64 and 73 both by 8

64 / 8 = 8

73 / 8 = 9.125 (which is really close to 9 so we'll be rounding that down)

So now I know that across the top of my quilt I can make 8 scallops that are 8" long and down each side I can make 9 scallops that are 8" long.


Want to see another example?  Let's say you've made a baby quilt that is 45" x 45"

width: 45" - 4" = 41"

length: 45" - 4" = 41"

If I divide by 7, I get 5.85

So I can make 6 scallops per side that are about 7" long 

If I divide by 8, I get 5.125

Which means I could make 5 scallops per side that are about 8" long

If I divide by 4, I get 10.25

Which means I could make 10 scallops per side that are about 4" long


See how many options you have when you do the math yourself? I love that!

There is a bit of wiggle room and you really can play around with what size of scallop you want to have.  With a smaller quilt like a baby or crib size, I'd probably go for a shorter length of scallop.  But for a queen or king I'd use a longer scallop.  

When doing the math, there's no one right answer. Play around with the numbers and you can even go ahead and mark a few scallops on the quilt to see if you like the scale of the scallop in comparison to the quilt design!


How to add a scallop border to a quilt - a tutorial by A Bright Corner - tips for making a scalloped edge on a quilt

Be sure to pin one of these images so you can find this tutorial again later!

How to add a scallop border to a quilt - a tutorial by A Bright Corner - an easy way to make a scalloped edge on a quilt


Wednesday, October 14, 2020

SewPINK + Hearstrings Quilt Block Tutorial

Hello friends and new visitors!  Today I'm sharing a new quilt block tutorial - one that is close to my heart.  

Heartstrings quilt block tutorial by A Bright Corner - scrappy quilt block - free heart quilt block - breast cancer quilt idea

Recently I was invited to participate in the #SewPINK initiative created by ByAnnie.com and I didn't hesitate for a moment.  You see, I am a breast cancer survivor myself and I will take any opportunity to bring awareness to this important issue. 

Nearly five (!) years ago I was diagnosed with breast cancer and underwent a bilateral (double) mastectomy. During the difficult months of recovery, some dear friends secretly gathered heart quilt blocks from fellow quilters and stitched them together into a sweet quilt which was presented to me.  The beautiful, scrappy quilt included a label on the back with an inspirational quote and the names of all who contributed in some way to the quilt.  It is still one of my most treasured quilts and brings tears to my eyes just talking about it.


With that beloved quilt in mind, I wanted to share a tutorial for a quilt block that could be used by a group of friends or a guild to make a personalized and meaningful gift for someone battling cancer or going through a difficult time.  

Heartstrings quilt block tutorial by A Bright Corner - great for scraps or a block swap - heart quilt block free

This Heartstrings quilt block is a foundation pieced and applique block but it is beginner friendly and is great for using scraps.  I wanted you to be able to pull from what you already owned to make these blocks - use those scraps, favorite treasured fabrics, and prints with some meaning behind them.


**scroll to the bottom to read more about the #SewPINK initiative and how you can play a part!  And be sure to read the details about the giveaway as well!


If you know basic foundation piecing techniques then you can breeze right through the first part of this tutorial.  And if you're not familiar with it - don't be intimidated!  Once you get the hang of it you'll love it.  Pssst.....scroll down to find info about a giveaway from ByAnnie.com! 

Shall we get started?  

First - Download and print the Heartstrings PDF pattern. That's where you'll get the outlines for each side of the heart.  You can print on regular printer paper like I did, or you can also use Foundation Paper.  If you're making a lot of these blocks I recommend using Foundation Paper because it tears away SO easily.  Carol Doak's Foundation Paper is my favorite - find it here on Amazon*


Makes one 12 1/2" x 12 1/2" quilt block

**This post contains affiliate links, which means I may receive a small commission (at no additional cost to you) when purchases are made through links found in this post. Thank you!

Scrap quilt idea - Heartstrings quilt block tutorial by Andy of A Bright Corner

Gather the following fabric:
  • a 6 1/2" x 11 1/2" piece for one half of the heart
  • a 12 1/2" x 12 1/2" background square
  • a variety of scraps / strips
You'll also need:
  • a washable gluestick (optional)
  • scissors
  • rotary cutter and mat
  • sewing machine that can do both straight stitching and zigzag
I love using Elmers washable glue for foundation piecing quilt blocks - paper piecing quilt blocks tips
 
We'll be working on the left side of the heart first, but using the BACK of the paper.  

1.  Place the first strip of fabric (right side up).  Use a bit of washable glue (Elmer's Washable School Glue is my favorite) to help that first strip stay in place.  You'll want to be sure that the strip fully covers the bottom of the heart from edge to edge.  You can hold the paper up to a window or a light to check this.  

TIP:  You need to sew the strips to the back of the paper so that when it comes time to trim the half heart shape you can see the lines.  To make the lines more visible on the backside, you can place the paper against the window and trace over the lines with a pencil.  

Scrap quilt idea - string pieced quilt block tutorial by A Bright Corner

2.  Place the second strip right sides together on top of the first strip.  Reduce your stitch length (I set my Juki TL-2010Q to a stitch length of 1).  

TIP:  When foundation piecing, it is essential to reduce your stitch length.  Having a really short stitch length will help to perforate the paper as you sew so it will be much easier to remove at the end!

Stitch along the edge of the fabric, stitching through strip 1 and 2 and the paper.  I try to still use a 1/4" seam allowance.

Scrap quilt idea - string pieced quilt block tutorial by A Bright Corner

3. Fold open strip 2 and press.  

Scrap quilt idea - string pieced quilt block tutorial by A Bright Corner

4.  Have some fun with these strips - for my 3rd strip I wanted it to be at a different angle so I placed it how I wanted it, and then stitched 1/4" from the edge of the 3rd strip.

Scrap quilt idea - string pieced quilt block tutorial by A Bright Corner

See how it's going to leave a large seam allowance on that 2nd strip?  That's ok!  I'll just fold back the paper and trim that seam allowance to be 1/4".  

TIP:  The Add-A-Quarter ruler is really helpful for trimming up seam allowances when foundation piecing.

Scrap quilt idea - string pieced quilt block tutorial by A Bright Corner

There....all trimmed up nice and neat!

Scrap quilt idea - string pieced quilt block tutorial by A Bright Corner

5. Fold open the 3rd strip and press.  

String pieced quilt block - a foundation piecing tutorial - Heartstrings quilt block tutorial by A Bright Corner

6. Continue adding strips, varying the width of the strips and the angles.  Just be sure that each strip you add is WIDER than the heart shape.  At the end we'll trim it down and you don't want any strip to end up too short or you'll have to start over. 

String pieced quilt block - a foundation piecing tutorial - Heartstrings quilt block tutorial by A Bright Corner

Now I have my heart shape all covered.  See the photo below for the view from the other side...

quilt foundation piecing tutorial - Heartstrings quilt block tutorial by A Bright Corner

7.  Time to trim the heart!  Use scissors to trim around the outside edge of the heart.  Carefully remove all the paper on the back side of the heart.

Heartstrings quilt block tutorial from A Bright Corner - foundation pieced string quilt block

Set it aside for now and work on the right side of the heart.

Scrappy heart quilt block tutorial by Andy of A Bright Corner

8. Use scissors to cut out the half heart template and pin it to the 6 1/2" x 11 1/2" piece of fabric.  

TIP: Because this is a larger piece of fabric, you have a great opportunity to use a print that has a special meaning or message.  I love this print from Riley Blake Designs - I had it in my stash and I love that it had some positive and encouraging messages on it.  

Scrappy heart quilt block tutorial by Andy of A Bright Corner

9. Cut out the heart shape along the solid outer line.

Heart quilt block tutorial by A Bright Corner - great scrappy quilt idea

10. Place the two heart halves right sides together and using a 1/4" seam and a regular stitch length, sew the two halves together along the center stitch line.  

Heart quilt block tutorial by A Bright Corner - great scrappy quilt idea

11. Press seam toward the solid (right) half and trim off the little dog ear at the bottom point of the heart (see photo above).

Heart quilt block tutorial by A Bright Corner - great scrappy quilt idea

12. It's now ready to be appliqued to the background square.  You have some options here - you can place your heart at a fun angle (as in the photo above), or center it.  

TIP: Be sure the heart is placed at least 1/2" away from all sides of the background square so it won't get caught in the seam when you're sewing the blocks together.  

If you choose to center the heart, fold the background square in half and finger press to crease.  Use that crease to help you center the heart.  You can see the heart centered over the crease in the photo below.

Elmer's Washable school glue is perfect for using with foundation piecing in quilting.  Plus check out this free heart quilt block tutorial by A Bright Corner

13. Time to use our helpful Elmer's washable school glue again.  I sure love this stuff when I'm foundation piecing.  Use a bit of glue in a few spots around the edges of the heart to hold it in place while you applique.  You can also pin the heart in place as well if you prefer.  

Heartstrings quilt block tutorial by Andy of A Bright Corner - applique quilt block done on a Baby Lock machine

14. Use a small zigzag or blanket stitch (and coordinating thread) to stitch all the way around the heart and secure it to the background square.  On my Baby Lock Sofia 2 I used stitch #8, at 2.5 wide and 1.0 length.  

So that the zigzag stitch would not be as noticeable, I used a lighter pink thread on the left half and a darker pink thread on the right half.  

Heartstrings quilt block tutorial by Andy of A Bright Corner - fun Valentine quilt idea

You're Heartstrings block is done!  


If you want to add more personality to your block, another option is to piece the background square!  To do this you'll need two rectangles, 6 1/2" x 12 1/2"


Heartstrings quilt block tutorial from A Bright Corner - perfect scrap quilt idea

For this block I used some low volume scrap strips and switched which side I used the strips. 

Heartstrings quilt block tutorial from A Bright Corner - perfect scrap quilt idea

TIP:  If you use lighter fabrics in your heart, be aware that the background print may show through.  For this reason, I chose a light pink background for the right side.  

Fun and scrappy Heartstrings Quilt Block tutorial by A Bright Corner

Center the heart on the background square as we did before, glue or pin in place, and zigzag stitch around the heart to secure it.

Fun and scrappy Heartstrings Quilt Block tutorial by A Bright Corner

And below you can see both of my blocks together.  I think I'll keep going and make enough of these for a throw quilt.  They're so fun and scrappy!


Heartstrings Quilt Block Tutorial by A Bright Corner - so fun and scrappy and would be great for a quilt block swap

If you make a Heartstrings block I'd love to see it! Be sure to tag me (#abrightcorner) on social media and use the hashtags: #HeartstringsQuiltBlock and #abrightcorner so we can all see what you create!  

Giveaway

Edited to add:  Giveaway is now closed - thank you everyone!  The winner is Esther G.  Congrats Esther!  

Ready for the giveaway info?  ByAnnie.com is giving one of my lucky readers a $30 gift card!  To enter, simply leave a comment on this post.  I'll randomly choose a winner on October 20, 2020 and notify them by email (so make sure you include your email address in your comment!)  And a big thank you to ByAnnie.com for the giveaway!

Heartstrings Quilt Block Tutorial by Andy of A Bright Corner


Thanks for visiting!  If you're new here, you might also be interested in:


Ready for more #SewPINK projects? Check out the talented creators that are a part of this blog tour:

✂ Oct. 1 (Thur): Mister Domestic

✂ Oct. 5 (Mon): Sewfinity

✂ Oct. 7 (Wed): Great Heron Thread

✂ Oct. 9 (Friday): Knot and Thread

✂ Oct. 12 (Mon): Snuggles Quilts

✂ Oct. 14 (Wed): A Bright Corner

✂ Oct. 16 (Fri): Suzn Quilts

✂ Oct. 19 (Mon): HUGS'N KISSES

✂ Oct. 20 (Tues): Sallie Tomato

✂ Oct. 22 (Thur): Masterpiece Quilting, Nancy Scott 

✂ Oct. 23 (Fri): Meadow Mist Designs

✂ Oct. 26 (Mon): LoveYouSew

✂ Oct. 27 (Tue): Teresa Coates

✂ Oct. 31 (Sat): Sookie Sews of Sue O'Very Designs


#sewpink initiative 2020


The #SewPink Initiative was created by ByAnnie.com LLC to raise awareness for breast cancer throughout the year. Our efforts culminate in an annual blog hop during October’s Breast Cancer Awareness Month to promote self-care, awareness, early detection and support for those affected by breast cancer. 

To learn more and see the calendar of events visit: https://www.ByAnnie.com/SewPINK

To find screenings available near you: 

To donate directly to the Breast Cancer Research Foundation visit: https://give.bcrf.org/give/31404/#!/donation/checkout


Did you know?
If you haven't yet, please make an appointment for a breast cancer screening!


Related Posts Plugin for WordPress, Blogger...